Showing posts with label advanced. Show all posts

Tuesday, March 10, 2015

MySQL 5.7.6 is out. Be prepared for big changes


Today Oracle released MySQL 5.7.6 milestone 16. With this, MySQL 5.7 has been in development for over 2 years.
Compared to MySQL 5.6, the changes are quite extensive. The main effort of the team has been focused on speed, with performance reportedly improved from 2 to 3 times compared to previous releases.
A full list of what is new would take too much space here, but I would like to mention some key points:


  • Oracle has spent a considerable amount of energy in the improvement of MySQL security and safety. You will see many new features, but even more old features that were deprecated and more that were removed after deprecation in 5.6.
  • The installation process has been changing in every milestone release of MySQL 5.7, always towards the goal of making MySQL more robust. The effort, though, will break compatibility with installation practices used for previous versions.

In this article, I will cover the biggest changes during installation.
In MySQL 5.6, mysql_install_db has an option for the generation of a random password during database creation. The process is unfriendly to scripting but it is a step in the direction of ending the long time practice of creating a root user without a password.
In MySQL 5.7.4, there was a further change, with the random password generation becoming the default, with the possibility of skipping the creation with the option –skip-random-password.
In MySQL 5.7.5, the default was confirmed, but the option was changed to –insecure.


And now, in MySQL 5.7.6, the crackdown on old practices continues: mysql_install_db is deprecated, and replaced with mysqld –initialize (formerly known as “mysqld –bootstrap,” now deprecated.)
Here’s a test run:


$ ~/opt/mysql/5.7.6/bin/mysqld --no-defaults --basedir=~/opt/mysql/5.7.6/ --datadir=$PWD/data --initialize
2015-03-09T05:06:37.159659Z 0 [Warning] TIMESTAMP with implicit DEFAULT value is deprecated. Please use --explicit_defaults_for_timestamp server option (see documentation for more details).
2015-03-09T05:06:37.355155Z 0 [Warning] InnoDB: New log files created, LSN=45790
2015-03-09T05:06:37.410118Z 0 [Warning] InnoDB: Creating foreign key constraint system tables.
2015-03-09T05:06:37.467002Z 0 [Warning] Failed to setup SSL
2015-03-09T05:06:37.467029Z 0 [Warning] SSL error: SSL context is not usable without certificate and private key
2015-03-09T05:06:37.468142Z 1 [Warning] A temporary password is generated for root@localhost: f<jqhdJ(A5p#

Compared to the previous versions, the most notable difference is that there is no .mysql_secret file, but a simple line on the screen mentioning the temporary password.
But there is one, more important behavioral difference: this command works only once. When using mysql_install_db, you could run the same command even if the data directory existed, where the script would re-apply the data creation commands. Using mysqld –initialize, you can only run on a non-existing data directory.


$ ~/opt/mysql/5.7.6/bin/mysqld --no-defaults --basedir=~/opt/mysql/5.7.6/ --datadir=$PWD/data --initialize
2015-03-09T05:49:12.504413Z 0 [Warning] TIMESTAMP with implicit DEFAULT value is deprecated. Please use --explicit_defaults_for_timestamp server option (see documentation for more details).
2015-03-09T05:49:12.505398Z 0 [ERROR] --initialize specified but the data directory exists. Aborting.
2015-03-09T05:49:12.505422Z 0 [ERROR] Aborting

Using the newly created database is a bit more trickier than before:


$ ~/opt/mysql/5.7.6/bin/mysql --no-defaults   -u root -p
Enter password:
Welcome to the MySQL monitor.  Commands end with ; or \g.
Your MySQL connection id is 2
Server version: 5.7.6-m16

Copyright (c) 2000, 2015, Oracle and/or its affiliates. All rights reserved.

Oracle is a registered trademark of Oracle Corporation and/or its
affiliates. Other names may be trademarks of their respective
owners.

Type 'help;' or '\h' for help. Type '\c' to clear the current input statement.

mysql> use mysql
ERROR 1820 (HY000): You must SET PASSWORD before executing this statement
mysql> set password=password('test');
ERROR 1064 (42000): You have an error in your SQL syntax; check the manual that corresponds to your MySQL server version for the right syntax to use near 'password('test')' at line 1

Uh? What’s this? This command used to work until recently. The reason is a change in the syntax of SET PASSWORD, which now accepts a plain text argument:


mysql> set password='test';
Query OK, 0 rows affected (0.00 sec)

The old syntax was meant to be only deprecated, but it was accidentally completely removed. This will be hopefully fixed in MySQL 5.7.7.


More changes involve the use of GRANT, REVOKE, CREATE USER, and ALTER USER, which now are more strict. You get warnings if you try to create users with the GRANT command, or when mixing granting of privileges with authentication options.


mysql> grant all on test.* to testuser identified by 'test';
Query OK, 0 rows affected, 1 warning (0.00 sec)

Warning (Code 1287): Using GRANT for creating new user is deprecated and will be removed in future release. Create new user with CREATE USER statement.

mysql> grant all on *.* to testuser identified by 'test';

Query OK, 0 rows affected, 1 warning (0.00 sec)


Warning (Code 1287): Using GRANT statement to modify existing user's properties other than privileges is deprecated and will be removed in future release. Use ALTER USER statement for this operation.

In short, if you have automated scripts that deal with installing and administering MySQL, you should test them with warnings enabled, and be prepared for broken compatibility with your old practice.


One such ‘old practice’ scripts that is broken by the new syntax changes is MySQL-Sandbox. I have just released an updated version (MySQL Sandbox 3.0.48) with a workaround for MySQL 5.7.6 changed SET PASSWORD syntax.


BTW, did I mention that the password field in the mysql.user table was removed? That’s another surprise that may break quite a lot of existing tests:


mysql> use mysql
Database changed
mysql> select host,user,password from user;
ERROR 1054 (42S22): Unknown column 'password' in 'field list'

mysql> select host, user, authentication_string from user;
+-----------+-------------+-------------------------------------------+
| host      | user        | authentication_string                     |
+-----------+-------------+-------------------------------------------+
| localhost | root        | *6C387FC3893DBA1E3BA155E74754DA6682D04747 |
| 127.%     | msandbox    | *6C387FC3893DBA1E3BA155E74754DA6682D04747 |
| localhost | msandbox    | *6C387FC3893DBA1E3BA155E74754DA6682D04747 |
| localhost | msandbox_rw | *6C387FC3893DBA1E3BA155E74754DA6682D04747 |
| 127.%     | msandbox_rw | *6C387FC3893DBA1E3BA155E74754DA6682D04747 |
| 127.%     | msandbox_ro | *6C387FC3893DBA1E3BA155E74754DA6682D04747 |
| localhost | msandbox_ro | *6C387FC3893DBA1E3BA155E74754DA6682D04747 |
| 127.%     | rsandbox    | *B07EB15A2E7BD9620DAE47B194D5B9DBA14377AD |
| %         | testuser    | *94BDCEBE19083CE2A1F959FD02F964C7AF4CFC29 |
+-----------+-------------+-------------------------------------------+
9 rows in set (0.00 sec)

Sunday, March 06, 2011

Advanced replication for the masses - Part III - Replication topologies

After part I: the basics, and part II: parallel apply, we deal now with some more mundane topic, or how to deploy replication services in a way that they fit our business, covering from the basic master/slave to the most advanced multi-source scheme.

Master/slave

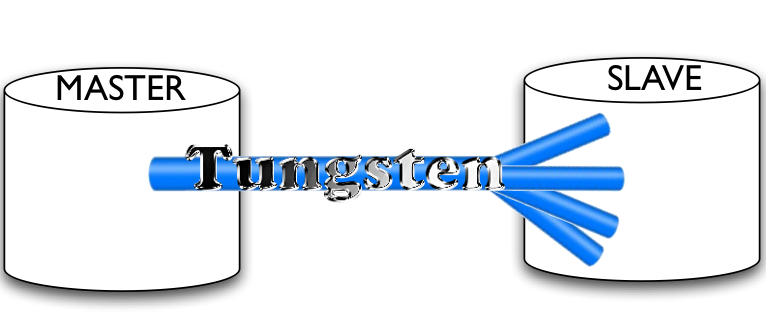
The most common topology is master/slave. One master, many slaves. This topology is equivalent to MySQL native replication. The differences are in the additional features. Tungsten supports seamless failover and parallel replication in all topologies.

Figure 1. Tungsten master/slave replication
Unlike MySQL, and unlike previous versions of Tungsten, the implementation of this topology uses a dedicated service for the master, and deploys a corresponding service on each slave. In MySQL, and old Tungsten, there is just a general purpose pipeline that connects from master to slave. In Tungsten Replicator, instead, you need to define a service explicitly. While this requirement looks like overkill for such a simple topology, it will be clear that it helps defining advanced topologies.

Relayed replication

The first time that I saw this topology with Tungsten, it was by mistake. I wanted to connect host Delta with host Alpha, but by a combination of bad cut-and-paste and mindlessness, I connected the slave Delta to a seemingly non-existent master Bravo (figure 2).

Figure 2. Tungsten master/slave replication with relay
The funny thing is that I did not realize the error, because the test that I wrote to certify that what I inserted in the master was then usable in all the slaves, worked without a problem. Thus I learned another feature of Tungsten: every slave is also a relay slave, without need of any additional setup. It does not matter if the slave is using binary logs, or if it has enabled the logs-slave-updates option. Those requirements are for MySQL native replication. Tungsten slave replicator services can detect a request from another slave, and act as a relay slave if necessary.

Bi-directional replication

Here is where people used to MySQL replication start to be surprised. To set a master-to-master topology, we deploy two services for each host. The first host sets a master service named alpha, and a remote slave service named bravo. The second host does the opposite: a local master service named bravo, and a remote slave service named alpha. (Figure 3)

Figure 3. Tungsten bi-directional replication
Whatever is updated on host alpha is processed and sent to remote slaves by the master replicator service alpha. Whatever is updated in host bravo is processed by the master replicator service bravo and dispatched to its audience.
This system works like MySQL master-to-master replication. There is no conflict resolution handling. The prerequisite, for this and the following topologies, is that you know what you are doing and leverage the replication system within its limitations.

Multiple site replication

This is an extension of bi-directional replication. For each master, there is one or more slaves. Figure 4 shows a typical implementation. You have a main site in one location, and want to have a backup system in another location. If disaster strikes in your main location, you are ready to switch over to the alternate site with minimum delay.

Figure 4. Tungsten multiple site replication
The reliability and robustness of this scheme depends on your applications. Nothing prevents you from writing to both masters at once. And if you keep the tasks logically separated (e.g. master alpha writes on database products, while master bravo writes on database employees) nothing bad will happen. But if your applications update the same records, you can suffer either a duplicate key error or silent loss of changes when a master writes on top of an already updated record.
This topology is frequently used in combination with a virtual IP provider, a system that shields both clusters from the application's view, and let it connect through an IP that is associated to the active master. There are many such systems, including Linux HA and Tungsten Enterprise. But that is beyond the scope of this post.

Multiple source replication

This topology is extremely popular, at least judging from the many times that it has been requested to me. So strangely popular, in fact, because it does not exist, at least as far as MySQL replication is concerned. One of the limits of MySQL native replication is that every slave can have only one master.
This topology has been explained to me in many ways. One of the most common is this. You have a company that has a headquarters in a town, say New York. That company has stores in many cities, and the management would like to get the data from each store to the headquarters, in real time. This is the opposite of the master/slave topology, and no matter how creative you become, you can't get MySQL to do it.
Using Tungsten, you can implement this topology fairly easily. (Figure 5)

Figure 5. Tungsten multiple source replication
Each server deploys a master replicator service. The host in headquarters deploys one slave service for each of the remote masters.
Of course, there is no conflict resolution handling. If you r remote masters don't behave within the limits that you want them to have, you will get in trouble, and replication may stop. However, if you know what you're doing and set the system properly, at least you can achieve the goal of getting this reverse replication scheme working smoothly.

Hands on

To help the early adopters, I have put together a set of scripts that deploy easily any of the topologies mentioned in this post with just a few actions.
What you need is 4 hosts (four copies of the virtual machine mentioned in part I will do), and the Tungsten deployer package that you will get from the Tungsten downloads page.
Once you have the four server, unpack the deployer scripts on a chosen directory in all servers, making sure that the directory is the same in all four. Inside the package, there is a README file with a detailed list of instructions. So detailed, in fact, that I won't copy it here because it would make this post too long.

I will just show a sample run:
$ ./set_multi_source.sh 
QA1
installation OK

NAME              VALUE
----              -----
appliedLastSeqno: 0
appliedLatency  : 1.243
role            : master
serviceName     : alpha
serviceType     : local
started         : true
state           : ONLINE
Finished services command...

QA2
installation OK

NAME              VALUE
----              -----
appliedLastSeqno: 0
appliedLatency  : 1.264
role            : master
serviceName     : bravo
serviceType     : local
started         : true
state           : ONLINE
Finished services command...

QA3
installation OK

NAME              VALUE
----              -----
appliedLastSeqno: 0
appliedLatency  : 0.812
role            : master
serviceName     : charlie
serviceType     : local
started         : true
state           : ONLINE
Finished services command...

QA4
installation OK

Processing services command...
NAME              VALUE
----              -----
appliedLastSeqno: 0
appliedLatency  : 29.521
role            : slave
serviceName     : alpha
serviceType     : local
started         : true
state           : ONLINE
NAME              VALUE
----              -----
appliedLastSeqno: 0
appliedLatency  : 20.123
role            : slave
serviceName     : bravo
serviceType     : remote
started         : true
state           : ONLINE
NAME              VALUE
----              -----
appliedLastSeqno: 0
appliedLatency  : 12.726
role            : slave
serviceName     : charlie
serviceType     : remote
started         : true
state           : ONLINE
Finished services command...

$ ./test_flow_multi_source.sh 
inserting 100 into each of the three masters. Please wait
Retrieving data from the masters
QA1
+----+-----+------+
| t  | c   | s    |
+----+-----+------+
| t1 | 100 | 5050 |
+----+-----+------+

QA2
+----+-----+------+
| t  | c   | s    |
+----+-----+------+
| t2 | 100 | 5050 |
+----+-----+------+

QA3
+----+-----+------+
| t  | c   | s    |
+----+-----+------+
| t3 | 100 | 5050 |
+----+-----+------+

Retrieving data from the slave
QA4
+----+-----+------+
| t  | c   | s    |
+----+-----+------+
| t1 | 100 | 5050 |
| t2 | 100 | 5050 |
| t3 | 100 | 5050 |
+----+-----+------+

Happy hacking!

Friday, February 25, 2011

Advanced replication for the masses - Part II - Parallel replication

parallel_replication_image I hope you liked the first part of this series of lessons. And I really hope that you have followed the instructions and got your little replication cluster up and working.
If you haven't done that, thinking that you would spare your energies for more juicy matters, I have news for you. What I explained in the previous part is exactly what you need to do to set up parallel replication. With just a tiny additional detail.
For the sake of the diligent readers who have followed the instructions with the first lessons, I won't repeat them, but I'll invite you to set the environment as explained in the first part.
Once you have a cluster up and running, and you can confirm that replication is indeed working with Tungsten, you can remove all with the clear_cluster.sh script, and launch again the set_installation.sh script, with the tiny detail we have mentioned above.
The astute readers may have noticed that the installation script contains these lines:
...
MORE_OPTIONS=$1
./configure-service --create --role=master $MORE_OPTIONS logos1
./tungsten-replicator/bin/trepctl -service logos1 start

./configure-service --create --role=slave --master-host=QA2 \
    --service-type=remote $MORE_OPTIONS logos2
...
This means that you can start set_replication.sh with one additional option, which will be passed to the creation of the Tungsten service. Without further suspense, the addition that you need is --channels=5.
Yep. It was that easy.
./set_replication.sh --channels=5
This little addition will start your Tungsten replicator, apparently in the same way it did before. But there is a substantial difference. While the data is funneled from the master to the slaves in the usual way, the applier splits the data by database. You can see the difference as soon as you send some data through the pipeline.
#master
mysql -h tungsten1 -e 'create schema mydb1'
mysql -h tungsten1 -e 'create schema mydb2'
mysql -h tungsten1 -e 'create schema mydb3'
mysql -h tungsten1 -e 'create table mydb1.t1 (i int)'
mysql -h tungsten1 -e 'create table mydb2.t1 (i int)'
mysql -h tungsten1 -e 'create table mydb3.t1 (i int)'
mysql -h tungsten1 -e 'select seqno,source_id,eventid  from tungsten_logos.trep_commit_seqno'
+-------+-----------+----------------------------+
| seqno | source_id | eventid                    |
+-------+-----------+----------------------------+
|     6 | tungsten1 | 000002:0000000000000939;43 |
+-------+-----------+----------------------------+
Everything under control. The master has sent 6 events through the pipeline. Now, let's see what the slave has to say:
# slave
mysql -h tungsten2 -e 'select seqno,source_id,eventid  from tungsten_logos.trep_commit_seqno'
+-------+-----------+----------------------------+
| seqno | source_id | eventid                    |
+-------+-----------+----------------------------+
|     0 | tungsten1 | 000002:0000000000000426;34 |
|     0 | tungsten1 | 000002:0000000000000426;34 |
|     4 | tungsten1 | 000002:0000000000000763;41 |
|     5 | tungsten1 | 000002:0000000000000851;42 |
|     6 | tungsten1 | 000002:0000000000000939;43 |
+-------+-----------+----------------------------+
Notice, at first sight, that there are five rows instead of one. Each row is a channel. Since the master has used three databases, you see three channels occupied, each one showing the latest sequence that was applied. Now, if we do something to database mydb2, we should see one of these channels change, while the others stay still.
# master
mysql -h tungsten1 -e 'insert into mydb2.t1 values (1)'
mysql -h tungsten1 -e 'insert into mydb2.t1 values (2)'

# slave
mysql -h tungsten2 -e 'select seqno,source_id,eventid  from tungsten_logos.trep_commit_seqno'
+-------+-----------+----------------------------+
| seqno | source_id | eventid                    |
+-------+-----------+----------------------------+
|     0 | tungsten1 | 000002:0000000000000426;34 |
|     0 | tungsten1 | 000002:0000000000000426;34 |
|     4 | tungsten1 | 000002:0000000000000763;41 |
|     8 | tungsten1 | 000002:0000000000001124;45 |
|     6 | tungsten1 | 000002:0000000000000939;43 |
+-------+-----------+----------------------------+
The channel used by mydb2 had previously applied the sequence number 5. The latest sequence number was previously 6, used in another channel. After two more events in this database, the sequence number has jumped to 8.
The eventID has also changed. The first part of the eventID is the binary log number (as in mysql-bin.000002), the second is the log position (1124), and the third one is the session ID (45).
Enough of peeking over the replicator's shoulder. There are more tools that let you inspect the status of the operations.
We have seen trepctl services, which keeps some of its usefulness also with parallel replication. In the master, it says:
trepctl -host tungsten1 services
NAME              VALUE
----              -----
appliedLastSeqno: 8
appliedLatency  : 0.834
role            : master
serviceName     : logos
serviceType     : local
started         : true
state           : ONLINE
Which is mostly all we need to know.
Since the slave has more than one channel, though, we need more specialized information on that side of the applier. For this reason, we use a more specialized view. We may start with trepctl status, which has information that is roughly equivalent to "SHOW SLAVE STATUS" in MySQL native replication.
trepctl -host tungsten2 status 
NAME                     VALUE
----                     -----
appliedLastEventId     : 000002:0000000000000426;34
appliedLastSeqno       : 0
appliedLatency         : 0.846
clusterName            : 
currentEventId         : NONE
currentTimeMillis      : 1298626724016
dataServerHost         : tungsten2
extensions             : 
host                   : null
latestEpochNumber      : 0
masterConnectUri       : thl://tungsten1:2112/
masterListenUri        : thl://tungsten2:2112/
maximumStoredSeqNo     : 8
minimumStoredSeqNo     : 0
offlineRequests        : NONE
pendingError           : NONE
pendingErrorCode       : NONE
pendingErrorEventId    : NONE
pendingErrorSeqno      : -1
pendingExceptionMessage: NONE
resourcePrecedence     : 99
rmiPort                : -1
role                   : slave
seqnoType              : java.lang.Long
serviceName            : logos
serviceType            : local
simpleServiceName      : logos
siteName               : default
sourceId               : tungsten2
state                  : ONLINE
timeInStateSeconds     : 3483.836
uptimeSeconds          : 3489.47
Also this command, which is perfectly useful in single channel replication, lacks the kind of detail that we are after. Tungsten 2.0 introduces two variations of this command, with more detailed metadata.
trepctl -host tungsten2 status -name tasks
Processing status command (tasks)...
NAME                VALUE
----                -----
appliedLastEventId: 000002:0000000000001305;46
appliedLastSeqno  : 8
appliedLatency    : 0.84
cancelled         : false
eventCount        : 9
stage             : remote-to-thl
taskId            : 0
NAME                VALUE
----                -----
appliedLastEventId: 000002:0000000000001305;46
appliedLastSeqno  : 8
appliedLatency    : 0.841
cancelled         : false
eventCount        : 9
stage             : thl-to-q
taskId            : 0
NAME                VALUE
----                -----
appliedLastEventId: 000002:0000000000000426;34
appliedLastSeqno  : 0
appliedLatency    : 8.422
cancelled         : false
eventCount        : 2
stage             : q-to-dbms
taskId            : 0
NAME                VALUE
----                -----
appliedLastEventId: 000002:0000000000000426;34
appliedLastSeqno  : 0
appliedLatency    : 8.424
cancelled         : false
eventCount        : 1
stage             : q-to-dbms
taskId            : 1
NAME                VALUE
----                -----
appliedLastEventId: 000002:0000000000000763;41
appliedLastSeqno  : 4
appliedLatency    : 0.242
cancelled         : false
eventCount        : 3
stage             : q-to-dbms
taskId            : 2
NAME                VALUE
----                -----
appliedLastEventId: 000002:0000000000001305;46
appliedLastSeqno  : 8
appliedLatency    : 0.846
cancelled         : false
eventCount        : 5
stage             : q-to-dbms
taskId            : 3
NAME                VALUE
----                -----
appliedLastEventId: 000002:0000000000000939;43
appliedLastSeqno  : 6
appliedLatency    : 0.296
cancelled         : false
eventCount        : 3
stage             : q-to-dbms
taskId            : 4
The -name tasks command gives you a list of the latest tasks that were happening.
This is probably more information that you want to know about, but in case of troubleshooting it may become a blessing. Let's follow for a moment what's going on to appliedLastSeqno 8. You will find three tasks with this sequance number. The first one has stage "remote-to-thl", which is the stage where the transaction is transported from the master to the Transaction History List (THL, which is Tungsten lingo to what you may also call a relay log.). The second task that mentions appliedLastSeqno 8 is in stage "thl-to-q", which is the phase where a transaction is assigned to a given shard. The third occurrence happens in stage "q-to-dbms", which is where the transaction is executed in the slave.
For a different view of what is going on, you may use trepctl status -name shards. A Shard, in this context, is the criteria used to split the transactions across channels. By default, it happens by database. We will inspect its mechanics more closely in another post. For now, let's have a look at what shards we have in our slave:
trepctl -host tungsten2 status -name shards
NAME                VALUE
----                -----
appliedLastEventId: 000002:0000000000000763;41
appliedLastSeqno  : 4
appliedLatency    : 0.0
eventCount        : 2
shardId           : mydb1
stage             : q-to-dbms
NAME                VALUE
----                -----
appliedLastEventId: 000002:0000000000001305;46
appliedLastSeqno  : 8
appliedLatency    : 0.0
eventCount        : 4
shardId           : mydb2
stage             : q-to-dbms
NAME                VALUE
----                -----
appliedLastEventId: 000002:0000000000000939;43
appliedLastSeqno  : 6
appliedLatency    : 0.0
eventCount        : 2
shardId           : mydb3
stage             : q-to-dbms
NAME                VALUE
----                -----
appliedLastEventId: 000002:0000000000000426;34
appliedLastSeqno  : 0
appliedLatency    : 0.0
eventCount        : 6
shardId           : tungsten_logos
stage             : q-to-dbms
You may read the information quite easily. Each shard tells you by which key it was identified (shardID), and this is the same as the database name. The appliedLastSeqno and stage we have met already. The appliedLatency is roughly equivalent to MySQL's seconds behind master, but more granular than that. And eventCount tells you how many transactions went through this shard.
If you are the adventurous type, you may have a look at the THL itself, and get a glimpse of how the replication and the parallelism works.
In the slave, type the following
# slave
thl -service logos list |less
Then look for "SEQ#" and you will find the global transaction IDs, or look for "shard=", and you will see the split by database.

More goodies will come next week. Until then, happy hacking!

Tuesday, February 22, 2011

Advanced replication for the masses - Part I - Getting started with Tungsten Replicator

Tungsten Replicator MySQL DBAs and developers: oil your fingers and get ready to experience a new dimension of data replication. I am pleased to announce that Continuent has just released Tungsten Replicator 2.0, an open source data replication engine that can replace MySQL native replication with a set of advanced features.
A note about the source code. The current version of Tungsten Replicator available in the web site is free to use, but it is not yet the open source version. We need a few weeks more to extract the code from the enterprise tree and make a new build. But we did not want to delay the user experience. So everything that is in this build will come with the source code in a short while. In the meantime, enjoy what is available there and have as much fun as we are having.

Why you will want to install Tungsten Replicator 2.0

Tungsten Replicator has a real cool list of features. I am sure that most MySQL DBAs would find something in that list that makes their mouth water in expectation.
Among my favorite features, there is one that looks so innocently non-important that you may be tempted to dismiss it. I am talking about global transaction ID, which is paramount in helping the DBA in switching from master to slave in case of failure or maintenance. I will show an example of a seamless failover in this article.
More things to get excited about: Tungsten allows multiple master replication, i.e. one slave receiving data from several sources, and parallel replication, meaning that a slave can apply changes from the master using many parallel threads. I will talk about all of those features in my blog. But to get to that point, I will need to start by covering the basic installation first. Since Tungsten is much more powerful than MySQL native replication, it also comes with greater complexity. We are working at reducing such complexity. In the meantime, you can start with the instructions that come in this post.

Getting ready

You will need at least two servers, with Java 1.6, Ruby 1.8, and MySQL 5.1 installed.
You may use your own virtual machines, or spare servers, or you can use a pre-defined VMWare image that you can use with VMware player (or VMware Fusion on Mac).
The following instructions refer to the pre-configured VM. You may skip the initial steps if you are using your own servers.

  1. download a pre-configured image
    https://files.continuent.com.s3.amazonaws.com/Tungsten_MySQL_CentOS_5_5_VMWare_Image.7z
    Warning: it's 1.5 GB, and it expands to 5.5 GB
  2. Expand the VM
  3. Make a copy of the VM. Change the directory names so that you will refer to them as tungsten_vm1 and tungsten_vm2
  4. launch both VMs
  5. Connect to each VM. User names and password for root are in a .doc file within the VM directory.
  6. Change the hostname of the VMs to tungsten1 and tungsten2 (don't forget to modify /etc/sysconfig/network to make the name sticky)
  7. Update /etc/hosts/ with the IP address and hostname of both servers
  8. Switch to the tungsten user
    su - tungsten
  9. Create a directory $HOME/replicator
  10. Get the Tungsten package into that directory
    cd replicator
    wget https://s3.amazonaws.com/releases.continuent.com/tungsten-replicator-2.0.0.tar.gz
  11. Get the setup scripts from Tungsten Replicator home .
    wget http://tungsten-replicator.googlecode.com/files/simple_install_master_slave.tar.gz
  12. unpack the scripts in $HOME/replicator

I know this was a long list, but it is not terribly difficult. More difficult would be setting all the above manually. As it is today, all you need to do is running the "set_replication.sh" script and Tungsten will come alive to your server in less than one minute.
To do things properly, you will need to do the same operations on both servers. So, assuming that you have done everything in tungsten1, you can easily mirror the operations to tungsten2. The virtual machines come with an already installed public SSH key that makes your installation life easier.
# in tungsten1
cd $HOME/replicator
ssh tungsten2 mkdir replicator
scp simple_install_master_slave.tar.gz tungsten2:$PWD
scp tungsten-replicator-2.0.0.tar.gz tungsten2:$PWD
ssh tungsten2 'cd replicator; tar -xzf simple_install_master_slave.tar.gz '
Now that you have the same set of files in both machines, you can trust the wisdom of the installation files and run:
# tungsten1
./set_replication.sh
ssh tungsten2 $PWD/set_replication.sh
This will start the Tungsten replicator in both servers.

Cleaning up

The sample scripts come with one that is dedicated to cleaning up. There is a "clear_cluster.sh" script that will remove all test data from the database, sweep the tungsten directory away, leaving your system ready to start afresh. As this is a testing environment, this strategy is not so bad. But be aware of the potentially destructive nature of this script, and don't use it in a production environment.

Under the hood

Tungsten replicator is a complex piece of software, and it's easy to get lost. So here are a few tips on how to get your bearings.
You will find a log file under $HOME/replicator/tungsten/tungsten-replicator/logs/.
This is quite a noisy log, which is supposed to give the developers all information about what's going on in case of a failure. For newcomers, it is quite intimidating, but we are working at making it easier to read. (Be aware that you may find some references to "tungsten-enterprise" in the logs. Don't let this fact deter you. We are working at splitting the former name associations from the packages, and eventually you will only find references to modules named "tungsten-replicator-something" in the logs.)
At the end of the installation, you should have seen a line inviting you to modify your path to get the replication tools available at your fingertips. Most notable is trepctl, the Tungsten Replicator ConTroL.
Using this tool, you can get some information about the replicator status, and perform administrative tasks. A glimpse at the Tungsten Replicator Guide 2.0 will give you an idea of what you can do.
For now, suffices to say that you can use trepctl to get the state of the replicator.
Try, for example, the following:

$ trepctl -host tungsten1 services
NAME              VALUE
----              -----
appliedLastSeqno: 0
appliedLatency  : 0.933
role            : master
serviceName     : logos
serviceType     : local
started         : true
state           : ONLINE

$ trepctl -host tungsten2 services
NAME              VALUE
----              -----
appliedLastSeqno: 0
appliedLatency  : 0.966
role            : slave
serviceName     : logos
serviceType     : local
started         : true
state           : ONLINE
The most important things here are the "state" field, and the "appliedLastSeqno", which is the global transaction ID that we have mentioned before.
If you create or modify something in the master and issue this command again, you will see that the appliedLastSeqno will increment.
You can get some of this information from the MySQL database, where Tungsten keeps a table with the latest status. You may say that this table is roughly equivalent, at least in principle, to the information in SHOW SLAVE STATUS available with native replication.

$ mysql -h tungsten1 -u tungsten -psecret \
    -e 'select * from tungsten_logos.trep_commit_seqno\G'
*************************** 1. row ***************************
        task_id: 0
          seqno: 0
         fragno: 0
      last_frag: 1
      source_id: tungsten1
   epoch_number: 0
        eventid: 000002:0000000000000416;102
applied_latency: 0
What is this "tungsten_logos' database? It is the database that Tungsten creates for each service that was installed. In this case, 'logos' is the service name contained in this sample installation. If you modify the scripts in both servers, and replace 'logos' with 'ripe_mango', you will see that Tungsten creates a 'tungsten_ripe_mango' database, with the same kind of information.

The basic principle to acquire before moving to more complex topics is that replication in Tungsten is a collection of services. While the native MySQL replication is a simple pipeline from master to slave, without deviations, Tungsten implements several pipelines, which you can use one by one or in combination. It looks more complex than necessary, but in reality it makes your planning of complex topologies much easier. Instead of making basic replication more complex, Tungsten adopt the principle of deploying the appropriate pipeline or pipelines for the task.
I leave to Robert Hodges, CEO and main architect of Tungsten, the task of explaining the nuts and bolts.

A sample of Tungsten power: switching from master to slave

It is probably too much information already for a blog post, but I would like to leave you with the feeling that you are dealing with an extremely powerful tool.
The instructions below will perform a seamless switch between the master and the slave.
Please follow these steps, but make sure there is no traffic hitting the old master during this time, or you may experience consistency issues:

#first, we tell both servers to stop replicating
$ trepctl -service logos -host tungsten2 offline
$ trepctl -service logos -host tungsten1 offline

# Now that they are offline, we tell each server its new role
# tungsten2 becomes the new master
$ trepctl -service logos -host tungsten2 setrole -role master 

# and then we tell tungsten1 that it's going to be a slave,
# listening to tungsten2 for data
$ trepctl -service logos -host tungsten1 setrole -role slave -uri thl://tungsten2

# now we put both servers online with the new instructions
$ trepctl -service logos -host tungsten2 online
$ trepctl -service logos -host tungsten1 online

# and we check that indeed they are both online with the new roles.
$ trepctl -host tungsten1 services
$ trepctl -host tungsten2 services
After this set of instructions, tungsten2 is the master, and if we write to it, we will see the changes replicating to tungsten1.

That's it for today. In the next articles, we will take a look at parallel replication.

We want to hear from you

We have released Tungsten Replicator as open source because we believe this will improve the quality of our product. We are looking for bug reports, cooperation, suggestions, patches, and anything that can make the product better. You can report bugs at the project home.
We are particularly eager to hear about user experience. We are aware that the user interface can be better, and we need some input on this matter from interested users.

A note about security

What is described in this article is for testing purposes only. Please use the virtual machines that were mentioned in this article behind a firewall. The VM was designed with friendliness in mind, but as it is, it's far from secure.