Thursday, March 31, 2011

MySQL replication for demanding users

I have been working with MySQL replication for quite a while. I have dealt with simple replication setups and I have experimented with complex ones. Five years ago I wrote an article about advanced MySQL replication, which was mostly a dream on what you could do with imagination and skill, but the matter from that article is still not even remotely ready for production. Yet, since that article, I have been approached by dozens of people who wanted to know how to make the multiple master dream become reality. To all of them, I had to say, "sorry, this is just a proof of concept.Come back in a few years, it may become possible". It still isn't.
Despite its latest great technological advance, MySQL native replication is is very poor of topologies. What you can do with MySQL native replication is master-to-slave (which also includes relayed slaves), master-to-master, and circular replication.
replication topologies
Of these, circular replication is the closest thing to multiple masters that you can get with MySQL native replication, without the addition of third party services.
Circular replication is tricky to set up, although not unreasonably so. It works. With some patience and precision, you can build a cluster of a few nodes in circular replication. With luck, you can get them to work properly, without loops and with the data flowing to all the servers. Your luck runs out the moment one of the servers fails, or replication breaks down for whatsoever reason. Then you see that circular replication is actually more complicated than what it looks on the surface, and it is also quite brittle. That doesn't mean that circular replication is not used in production. It is. I have known several people who use it successfully, although nobody is really happy about it.
In addition to its fragility, circular replication is slow. If you insert data into master A, it has to travel across three nodes before reaching master D.
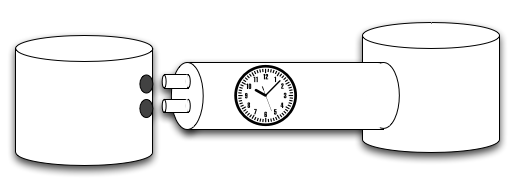
Another topology that seems to be very popular is the multiple source scheme. It is the opposite of master/slave. Instead of having one master that sends data to many slaves, it is many masters that send data to one slave. Despite its popularity, this topology is yet unimplemented with MySQL native replication. The best you can do to simulate the desired outcome is to do round-robin replication with cron.
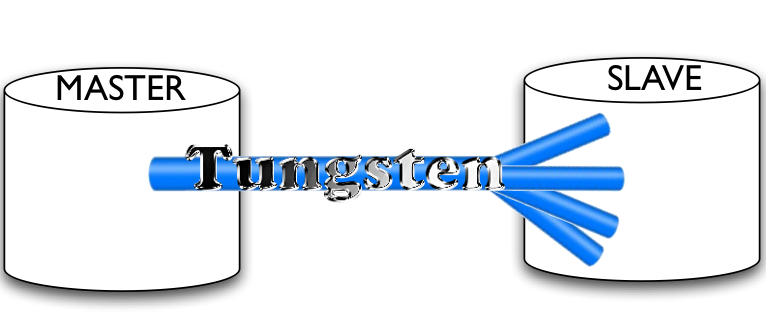
With this background, it is no surprise that I was thrilled at the idea of working for a company that has made these dreams become reality. Tungsten replicator allows users to have real multiple masters topologies, and even the much coveted multiple source topology is now within the users grasp.
Compared to MySQL replication, the drawback of using Tungsten is that you need to deal with bigger complexity. It's only natural. With so many more features, there come more pieces to take care of.
An interesting point about multiple masters is the matter of conflict resolution. Asynchronous replication convenience and robustness are countered by lack of means to deal with conflicts. This difficulty has been used many times as the reason for not implementing multiple source replication in MySQL. I have my own ideas on this issue. I am aware of the risks, but if I were allowed to do multiple master replication, I would be glad to take charge of the risks. Updating different databases, or different tables in separate masters is one way of defining a conflict-free scenario where multiple masters or multiple sources could be used safely. If only we could ...
My colleague Robert Hodges has posted some interesting aspects in his blog. The bottom line is that we focus on empowering users with advanced replication features. Conflict resolution can wait. I am sure many users would love to have the problem of how to avoid conflicts if the more demanding problem of how to replicate from many places to one cluster could be solved. The good news is that some sort of conflict detection (and possibly resolution) are possible even now, without slowing down the operations and without complicating our lives unnecessarily. For example, a simple conflict that could be avoided using Tungsten filters is the one resulting in a master that is updating tables that it was not supposed to do. In a scenario where multiple source replication works on the assumption that each master updates a given subset of the data, we can easily detect and eventually reject offending updates. It is not much, but in many practical cases it would be the difference between having robust multiple source replication and doing data load and consolidation manually.

Anyway, back to the present day with very much real multi-master replication available for everyone. To alleviate the fear of the unknown, we are organizing webinars on a regular basis, where we cover the theoretical points and give practical demos of how to use the new features.
If you are a demanding user, this upcoming webinar is for you: MySQL Multi-Master and Multi-Source Replication With Tungsten. Tomorrow, March 31st, 2011, at 10am PDT.

Thursday, March 17, 2011

How fast is parallel replication? See it live today

I talked about parallel replication last month. Since then, there has been a considerable interest for this feature. As far as I know, Tungsten's is the only implementation of this much coveted feature, so I can only compare with MySQL native replication.
The most compelling question is "how fast is it?"
That's a tricky one. The answer is the same that I give when someone asks me "how fast is MySQL". I always say: it depends.
Running replication in a single thread is sometimes slower than the operations in the master. Many users complain that the single thread can't keep up with the master, and the slave lags behind. True. There is, however, a hidden benefit of single threaded replication: it requires less resources. There is no contention for writing on disk, no need to worry about several users blocking a table. You need to contend with the users that want to read the tables, but the lone writer has an easy job, albeit a hard one.
When we introduce parallel replication, the easy job fades away, and we are faced with the problem: how do I allow several writers to do the work of one? It's a nice problem to have. MySQL native replication does not allow parallel apply, but with Tungsten you can start tackling the issue of allowing several parallel threads to update the system at once. Therefore, this is the same problem that you have on a server where several users are allowed to write at once. If the server has sufficient resources, the operations will be fast. If it doesn't, the operations will lag behind.
Another aspect of the question is "what kind of queries?" If your database is well established and set in stone, and you mostly UPDATEs, the replication performance will depend on how well your server is tuned for concurrent writes. If you run ALTER TABLE statements on a daily basis, your queries will queue up after that ALTER TABLE no matter what. And if you have only INSERT and DELETE queries, parallel replication will probably depend on how fast is your server.
Ultimately, I can tell you that I have seen or experienced directly a wide range of repeatable results. I know cases where parallel replication is three times as fast as native replication. These cases usually involve huge amounts of binary logs, like in the case when your slave needs to be taken off-line for a few hours or even days and then it tries to catch up. Other cases that can be reproduced with a minimal amount of sample data show parallel replication as being 30% to 50% faster. ANd then there are cases when your server is so poor on resources or the load is so unevenly distributed that parallel replication is as fast as native replication. I would say that these cases are easily cured by beefing up the server.
If you want to see a demo of how this replication works, you can join this webinar:
Zoom, Zoom, Zoom! MySQL Parallel Replication With Tungsten Replicator 2.0.
You can tell from the title that we are quite excited about the product that we are building.

Tuesday, March 15, 2011

Quick benchmarking trick

I have been doing quite a lot of benchmarking recently.
I needed to find a safe way of measuring the time spend by the database doing a long task, like catching up on a huge backlog of accumulated replication updates. The problem with measuring this event is that I can record when it starts, but I can't easily detect when it finishes. My initial approach was to monitor the database and count the tables rows to see when the task was done, but I ended up affecting the task performance with my additional queries. So I thought of another method.
Since I had control on what was sent from the master to the slave, I used the following:
The initial time is calculated as the minimum creation time of the databases that I know are created during the exercise. Let's say that I had 5 databases named from db1 to db5:
set @START = (select min(create_time) from information_schema.tables where table_schema like "db%")
Then, to make sure that I catch the exact moment that the task is finished, I added to the master a command for each database:
create table db1.last_table (i int);
create table db2.last_table (i int);
create table db3.last_table (i int);
create table db4.last_table (i int);
create table db5.last_table (i int);
To know if the task is done, I query the database as follows:
select count(*) from information_schema.tables where table_schema like "db%" and table_name="last_table";
If the count is less than 5 (the number of databases that were in my binary logs), I wait more.
Finally, when the count matches the expected one, I get the end time:

set @END = (select max(create_time) from information_schema.tables where table_schema like "db%" and table_name="last_table"');
Now I have two values, @START, and @END
select timediff(@END,@START) as elapsed;
+----------+
| elapsed  |
+----------+
| 00:09:44 |
+----------+
It does not matter if I query the database immediately, or hour after coming back from my errands. Using the table creation times makes sure that I get a clean start and finish time.
I put all the above in a script, and I can check the elapsed time without fear of mistakes.

Sunday, March 13, 2011

A cool terminal tip for Mac users

If you use a Mac, and you are dealing with many similar tasks at once, like examining many database servers in different terminals, you may like this one.
I have been using iTerm 2 for a while, and my handling of parallel tasks has improved a lot. (No, I am not talking about Parallel replication, although I have applied this trick while testing that technology as well.)
iTerm2 has some cool features, and probably the most striking one is split panes. That alone would be a good reason for giving iTerm2 a try. But the one that I use the most, often in combination with Split Panes, is called Send Input to all tabs.
Here is how it works.
Let's say I need to use 4 servers at once, and perform a non-repeating operation in all of them.
So I open a separate window and I split the screen into 5 panes. I connect to each server in the first four panes, and I open a vim instance in the fifth.
With that done, I enable the magic option.


A word of caution. This option sends the input to all the open tabs in your current window. If you don't want this to happen, do as I do, and open a separate window. Then make sure that all tabs, and eventually split panes, are supposed to receive your input. The application asks you for confirmation.


After that, whatever I type on one pane will be mirrored on all the panes. So I will see the commands running on my four servers, and being logged in a text file in the fifth one. All with just single command, I have all servers under control at once:

Replication and sandbox talks on the road - San Francisco, Santa Clara, Orlando

In a few weeks, I will be on the road, for an intense set of presentations in the USA.

San Francisco, April 7th

I will start the tour at the San Francisco MySQL User Group. On April 7, at 6pm I will talk about Advanced MySQL replication for the masses. This talk will explore topics such as bi-directional replication, multiple sources, parallel replication, seamless failover, with the help of Tungsten replicator.


O'Reilly MySQL Conference & Expo 2011

Santa Clara, April 11, 12

The MySQL conference starts on Monday, April 11th, with several three-hour tutorials.

Robert Hodges and Edward Archibald will also be presenting at the MySQL Conference.

On Tuesday evening I will fly to Orlando, to attend (part of) Collaborate11.

collaborate11 badge

Orlando, April 13

Tuesday, March 08, 2011

The MySQL Council addresses the public bug database issue

When I announced the MySQL Council, I said that among its roles there is that of being a bridge between the MySQL community and Oracle.
It has come the time where we put this role to good use. Recently, there have been some concerns about the MySQL bugs database, which could be summarized in Mark Callaghan's post Where have the bugs gone?.
The gist of the concerns is that there has been a change in the bugs handling, although we don't know what was changed and how. In short, there has been a total lack of communication. The MySQL Council has addressed the concerns about the public bug database in a recent meeting, and has taken several steps, like approaching Oracle directly, and releasing a summary of the concerns in its site.

The MySQL Council members have been discussing the decision by Oracle, to reduce the importance of the public MySQL bug database for providing input and direction of product updates and direction. The Council would also like to work with Oracle to promote communication around the status of the database access to the broader community so members will understand what to expect moving forward.

Without communication around the use and changes relating to the public bug database, there have been concerns in the community raised about duplicate bug tracking, bug numbers in commits not being visible to the public, difficulty in offering patches into the MySQL server, and the generalized decreased transparency in the evolution and remediation of the MySQL server and associated products.

The IOUG (Independent Oracle User Group) is supporting the MySQL Council in its efforts to raise questions and query direction from Oracle. The MySQL Council will be meeting with Oracle stakeholders to discuss options for keeping appropriate portions of the database active as well as communicating status and future actions to the broader community.
We don't know the outcome yet. But we'll surely post an update as soon as we hear it.

Monday, March 07, 2011

implementing table quotas in MySQL

I have just seen Limiting table disk quota in MySQL by Shlomi Noach, and I could not resist.
You can actually implement a disk quota using an updatable view with the CHECK OPTION.
Instead of giving the user access to the table, you give access to the view (at least for inserting, see the caveat at the end), and you will get a genuine MySQL error when the limit is reached.

drop table if exists logs;
create table logs (t mediumtext) engine=innodb;

drop function if exists exceeded_logs_quota ;
create function exceeded_logs_quota() 
returns boolean
deterministic
return (
    select CASE 
           WHEN (DATA_LENGTH + INDEX_LENGTH) > (25*1024) 
           THEN TRUE ELSE FALSE 
           END
    FROM 
        information_schema.tables 
    WHERE 
        table_schema=schema() 
        and table_name='logs'
    );

create or replace view logsview as 
    SELECT * FROM logs 
    WHERE NOT exceeded_logs_quota()
    WITH CHECK OPTION;

Here's a test run:
mysql [localhost] {msandbox} (test) > insert into logsview values ('a');
Query OK, 1 row affected (0.00 sec)

mysql [localhost] {msandbox} (test) > select exceeded_logs_quota();
+-----------------------+
| exceeded_logs_quota() |
+-----------------------+
|                     0 |
+-----------------------+
1 row in set (0.00 sec)

mysql [localhost] {msandbox} (test) > insert into logsview values (repeat('a', (25 * 1024) - 1));
Query OK, 1 row affected (0.00 sec)

mysql [localhost] {msandbox} (test) > select exceeded_logs_quota();
+-----------------------+
| exceeded_logs_quota() |
+-----------------------+
|                     1 |
+-----------------------+
1 row in set (0.00 sec)

mysql [localhost] {msandbox} (test) > insert into logsview values ('b');
ERROR 1369 (HY000): CHECK OPTION failed 'test.logsview'

You will need to twist the limit to adapt to InnoDB habits of allocating pages rather than bytes, but if you measure the limit in MB the method should work fine.

CAVEAT: You should give your users separate privileges: SELECT on logs, and INSERT on logsview. The view will only return records while exceeded_logs_quota() returns false.
mysql [localhost] {msandbox} (test) > select exceeded_logs_quota();
+-----------------------+
| exceeded_logs_quota() |
+-----------------------+
|                     1 |
+-----------------------+
1 row in set (0.00 sec)
mysql [localhost] {msandbox} (test) > select count(*) from logsview;
+----------+
| count(*) |
+----------+
|        0 |
+----------+
1 row in set (0.01 sec)

mysql [localhost] {msandbox} (test) > select count(*) from logs;
+----------+
| count(*) |
+----------+
|        2 |
+----------+
1 row in set (0.01 sec)

Sunday, March 06, 2011

Advanced replication for the masses - Part III - Replication topologies

After part I: the basics, and part II: parallel apply, we deal now with some more mundane topic, or how to deploy replication services in a way that they fit our business, covering from the basic master/slave to the most advanced multi-source scheme.

Master/slave

The most common topology is master/slave. One master, many slaves. This topology is equivalent to MySQL native replication. The differences are in the additional features. Tungsten supports seamless failover and parallel replication in all topologies.

Figure 1. Tungsten master/slave replication
Unlike MySQL, and unlike previous versions of Tungsten, the implementation of this topology uses a dedicated service for the master, and deploys a corresponding service on each slave. In MySQL, and old Tungsten, there is just a general purpose pipeline that connects from master to slave. In Tungsten Replicator, instead, you need to define a service explicitly. While this requirement looks like overkill for such a simple topology, it will be clear that it helps defining advanced topologies.

Relayed replication

The first time that I saw this topology with Tungsten, it was by mistake. I wanted to connect host Delta with host Alpha, but by a combination of bad cut-and-paste and mindlessness, I connected the slave Delta to a seemingly non-existent master Bravo (figure 2).

Figure 2. Tungsten master/slave replication with relay
The funny thing is that I did not realize the error, because the test that I wrote to certify that what I inserted in the master was then usable in all the slaves, worked without a problem. Thus I learned another feature of Tungsten: every slave is also a relay slave, without need of any additional setup. It does not matter if the slave is using binary logs, or if it has enabled the logs-slave-updates option. Those requirements are for MySQL native replication. Tungsten slave replicator services can detect a request from another slave, and act as a relay slave if necessary.

Bi-directional replication

Here is where people used to MySQL replication start to be surprised. To set a master-to-master topology, we deploy two services for each host. The first host sets a master service named alpha, and a remote slave service named bravo. The second host does the opposite: a local master service named bravo, and a remote slave service named alpha. (Figure 3)

Figure 3. Tungsten bi-directional replication
Whatever is updated on host alpha is processed and sent to remote slaves by the master replicator service alpha. Whatever is updated in host bravo is processed by the master replicator service bravo and dispatched to its audience.
This system works like MySQL master-to-master replication. There is no conflict resolution handling. The prerequisite, for this and the following topologies, is that you know what you are doing and leverage the replication system within its limitations.

Multiple site replication

This is an extension of bi-directional replication. For each master, there is one or more slaves. Figure 4 shows a typical implementation. You have a main site in one location, and want to have a backup system in another location. If disaster strikes in your main location, you are ready to switch over to the alternate site with minimum delay.

Figure 4. Tungsten multiple site replication
The reliability and robustness of this scheme depends on your applications. Nothing prevents you from writing to both masters at once. And if you keep the tasks logically separated (e.g. master alpha writes on database products, while master bravo writes on database employees) nothing bad will happen. But if your applications update the same records, you can suffer either a duplicate key error or silent loss of changes when a master writes on top of an already updated record.
This topology is frequently used in combination with a virtual IP provider, a system that shields both clusters from the application's view, and let it connect through an IP that is associated to the active master. There are many such systems, including Linux HA and Tungsten Enterprise. But that is beyond the scope of this post.

Multiple source replication

This topology is extremely popular, at least judging from the many times that it has been requested to me. So strangely popular, in fact, because it does not exist, at least as far as MySQL replication is concerned. One of the limits of MySQL native replication is that every slave can have only one master.
This topology has been explained to me in many ways. One of the most common is this. You have a company that has a headquarters in a town, say New York. That company has stores in many cities, and the management would like to get the data from each store to the headquarters, in real time. This is the opposite of the master/slave topology, and no matter how creative you become, you can't get MySQL to do it.
Using Tungsten, you can implement this topology fairly easily. (Figure 5)

Figure 5. Tungsten multiple source replication
Each server deploys a master replicator service. The host in headquarters deploys one slave service for each of the remote masters.
Of course, there is no conflict resolution handling. If you r remote masters don't behave within the limits that you want them to have, you will get in trouble, and replication may stop. However, if you know what you're doing and set the system properly, at least you can achieve the goal of getting this reverse replication scheme working smoothly.

Hands on

To help the early adopters, I have put together a set of scripts that deploy easily any of the topologies mentioned in this post with just a few actions.
What you need is 4 hosts (four copies of the virtual machine mentioned in part I will do), and the Tungsten deployer package that you will get from the Tungsten downloads page.
Once you have the four server, unpack the deployer scripts on a chosen directory in all servers, making sure that the directory is the same in all four. Inside the package, there is a README file with a detailed list of instructions. So detailed, in fact, that I won't copy it here because it would make this post too long.

I will just show a sample run:
$ ./set_multi_source.sh 
QA1
installation OK

NAME              VALUE
----              -----
appliedLastSeqno: 0
appliedLatency  : 1.243
role            : master
serviceName     : alpha
serviceType     : local
started         : true
state           : ONLINE
Finished services command...

QA2
installation OK

NAME              VALUE
----              -----
appliedLastSeqno: 0
appliedLatency  : 1.264
role            : master
serviceName     : bravo
serviceType     : local
started         : true
state           : ONLINE
Finished services command...

QA3
installation OK

NAME              VALUE
----              -----
appliedLastSeqno: 0
appliedLatency  : 0.812
role            : master
serviceName     : charlie
serviceType     : local
started         : true
state           : ONLINE
Finished services command...

QA4
installation OK

Processing services command...
NAME              VALUE
----              -----
appliedLastSeqno: 0
appliedLatency  : 29.521
role            : slave
serviceName     : alpha
serviceType     : local
started         : true
state           : ONLINE
NAME              VALUE
----              -----
appliedLastSeqno: 0
appliedLatency  : 20.123
role            : slave
serviceName     : bravo
serviceType     : remote
started         : true
state           : ONLINE
NAME              VALUE
----              -----
appliedLastSeqno: 0
appliedLatency  : 12.726
role            : slave
serviceName     : charlie
serviceType     : remote
started         : true
state           : ONLINE
Finished services command...

$ ./test_flow_multi_source.sh 
inserting 100 into each of the three masters. Please wait
Retrieving data from the masters
QA1
+----+-----+------+
| t  | c   | s    |
+----+-----+------+
| t1 | 100 | 5050 |
+----+-----+------+

QA2
+----+-----+------+
| t  | c   | s    |
+----+-----+------+
| t2 | 100 | 5050 |
+----+-----+------+

QA3
+----+-----+------+
| t  | c   | s    |
+----+-----+------+
| t3 | 100 | 5050 |
+----+-----+------+

Retrieving data from the slave
QA4
+----+-----+------+
| t  | c   | s    |
+----+-----+------+
| t1 | 100 | 5050 |
| t2 | 100 | 5050 |
| t3 | 100 | 5050 |
+----+-----+------+

Happy hacking!

Saturday, March 05, 2011

A hidden options file trick

I was listening today to the OurSQL Episode 36: It's Not Our (De)fault! Part 1. As usual, Sheeri and Sarah are very informational and entertaining while explaining the innards of MySQL and their best practices.
Being a DBA oriented show, there was an omission in this podcast. There was no mention of custom groups that you can have for your my.cnf. This is mostly useful for developers. If your application requires some specific settings, instead of using a separated configuration file, you can use a different group, and then instruct your client applications to use that group.
By default, all client applications read the "[client]" group.
But you can tell your client to read a group that you can call whatever you like.
For example, with this configuration file,
[client]
user=common_user
password=common_password

[logrotation]
user=log_rotation_daemon
password=specific_password

You can have a Perl script that takes care of your particular log rotation needs. Instead of the normal credentials, it will use the ones listed in the [logrotation] group.
use strict;
use warnings;
use DBI;

my $dsn =   "DBI:mysql:test;"
            . "mysql_read_default_group=logrotation;"
            . "mysql_read_default_file=$ENV{HOME}/./my.cnf";
my $dbh = DBI->connect($dsn);
Notice that, for this option to work, the [logrotation] group must come after the [client] group, or the directives in the [client] group will override the ones in [logrotation]. That's why, in the options file, you find the directives for [mysqldump] at the bottom of the file.

So far, so good. This was a trick for developers, and probably many developers know it already. But there is another, related trick, that can be used by non-developers as well.
If you knew about these customized groups, you may have realized that you can't use them with the mysql standard command line client. Or, to say it better, there is no clearly documented way of doing so. There is, in fact, a cute trick that you can use.
Let's say that, from time to time, you want to use a different prompt, but you don't want to edit your $HOME/.my.cnf to change it. You just want your prompt to be there in the option file, and be able to recall it when the situation calls for it.
The mysql internal help does not tell anything about groups. However, a careful search of the manual gives this cryptic entry:
  • --defaults-group-suffix=suffix, -g suffix

    In addition to the groups named on the command line, read groups that have the given suffix.
When I found it, I stared at this puzzling statement for a while. I could not understand which are the groups that are named in the command line.
Eventually, I figured out why there is a group-suffix and not simply a group. It means that if you add a suffix to a default group name, and you tell mysql to look for this suffix, then you will be able to use the appropriate group on demand.
For example, this options file will not work.
# wrong
[pinocchio]
prompt='I have a long nose  =======> '

[master]
prompt='master [\h] {\u} (\d) > '

[slave]
prompt='slave [\h] {\u} (\d) > '
But this one will work:
[mysqlpinocchio]
prompt='I have a long nose  =======> '

[mysqlmaster]
prompt='master [\h] {\u} (\d) > '

[mysqlslave]
prompt='slave [\h] {\u} (\d) > '

Here is a test run:

$ mysql --defaults-group-suffix=pinocchio
Welcome to the MySQL monitor.  Commands end with ; or \g.
Your MySQL connection id is 22
Server version: 5.1.54 MySQL Community Server (GPL)

Copyright (c) 2000, 2010, Oracle and/or its affiliates. All rights reserved.

Oracle is a registered trademark of Oracle Corporation and/or its
affiliates. Other names may be trademarks of their respective
owners.

Type 'help;' or '\h' for help. Type '\c' to clear the current input statement.

I have a long nose  =======> 

The meaning of the suffix part is that mysql will read the default groups (which are [client], and [mysql]), and it will also read any groups that are named "mysqlSUFFIX" or "clientSUFFIX". I have named the group "mysqlpinocchio" and therefore it has been used. It would have worked the same if I had called it "clientpinocchio".

Wednesday, March 02, 2011

beware of the log

The MySQL general log is one of my favorite features for a quick debug. I especially like the ability of starting and stopping it on demand, which was introduced in MySQL 5.1.
However, using the general log has its drawbacks.
Today I was debugging a nasty bug that results from two statements that should be applied sequentially, but that were instead concurrent. These kind of problems are hard to cope with, as they are intermittent. Sometimes all goes well, and you get the expected result. And then, sometimes the statements fly on different directions and I stare at the screen, trying to understand where did they stray.
After some try-and-fail, I decided to enable the general log just before the offending statements, and to turn it down immediately after. Guess what? With the general log on, the test never failed. What was an intermittently failing test became an always succeeding test.
What happened is that the general log delayed the query execution just enough for the following statement to arrive when it was expected.
In the end, the bug had to be unveiled using white box techniques.
Moral of the story: using a general log alters the status of the server. If you use it, be prepared to deal with its side effects.

Friday, February 25, 2011

Advanced replication for the masses - Part II - Parallel replication

parallel_replication_image I hope you liked the first part of this series of lessons. And I really hope that you have followed the instructions and got your little replication cluster up and working.
If you haven't done that, thinking that you would spare your energies for more juicy matters, I have news for you. What I explained in the previous part is exactly what you need to do to set up parallel replication. With just a tiny additional detail.
For the sake of the diligent readers who have followed the instructions with the first lessons, I won't repeat them, but I'll invite you to set the environment as explained in the first part.
Once you have a cluster up and running, and you can confirm that replication is indeed working with Tungsten, you can remove all with the clear_cluster.sh script, and launch again the set_installation.sh script, with the tiny detail we have mentioned above.
The astute readers may have noticed that the installation script contains these lines:
...
MORE_OPTIONS=$1
./configure-service --create --role=master $MORE_OPTIONS logos1
./tungsten-replicator/bin/trepctl -service logos1 start

./configure-service --create --role=slave --master-host=QA2 \
    --service-type=remote $MORE_OPTIONS logos2
...
This means that you can start set_replication.sh with one additional option, which will be passed to the creation of the Tungsten service. Without further suspense, the addition that you need is --channels=5.
Yep. It was that easy.
./set_replication.sh --channels=5
This little addition will start your Tungsten replicator, apparently in the same way it did before. But there is a substantial difference. While the data is funneled from the master to the slaves in the usual way, the applier splits the data by database. You can see the difference as soon as you send some data through the pipeline.
#master
mysql -h tungsten1 -e 'create schema mydb1'
mysql -h tungsten1 -e 'create schema mydb2'
mysql -h tungsten1 -e 'create schema mydb3'
mysql -h tungsten1 -e 'create table mydb1.t1 (i int)'
mysql -h tungsten1 -e 'create table mydb2.t1 (i int)'
mysql -h tungsten1 -e 'create table mydb3.t1 (i int)'
mysql -h tungsten1 -e 'select seqno,source_id,eventid  from tungsten_logos.trep_commit_seqno'
+-------+-----------+----------------------------+
| seqno | source_id | eventid                    |
+-------+-----------+----------------------------+
|     6 | tungsten1 | 000002:0000000000000939;43 |
+-------+-----------+----------------------------+
Everything under control. The master has sent 6 events through the pipeline. Now, let's see what the slave has to say:
# slave
mysql -h tungsten2 -e 'select seqno,source_id,eventid  from tungsten_logos.trep_commit_seqno'
+-------+-----------+----------------------------+
| seqno | source_id | eventid                    |
+-------+-----------+----------------------------+
|     0 | tungsten1 | 000002:0000000000000426;34 |
|     0 | tungsten1 | 000002:0000000000000426;34 |
|     4 | tungsten1 | 000002:0000000000000763;41 |
|     5 | tungsten1 | 000002:0000000000000851;42 |
|     6 | tungsten1 | 000002:0000000000000939;43 |
+-------+-----------+----------------------------+
Notice, at first sight, that there are five rows instead of one. Each row is a channel. Since the master has used three databases, you see three channels occupied, each one showing the latest sequence that was applied. Now, if we do something to database mydb2, we should see one of these channels change, while the others stay still.
# master
mysql -h tungsten1 -e 'insert into mydb2.t1 values (1)'
mysql -h tungsten1 -e 'insert into mydb2.t1 values (2)'

# slave
mysql -h tungsten2 -e 'select seqno,source_id,eventid  from tungsten_logos.trep_commit_seqno'
+-------+-----------+----------------------------+
| seqno | source_id | eventid                    |
+-------+-----------+----------------------------+
|     0 | tungsten1 | 000002:0000000000000426;34 |
|     0 | tungsten1 | 000002:0000000000000426;34 |
|     4 | tungsten1 | 000002:0000000000000763;41 |
|     8 | tungsten1 | 000002:0000000000001124;45 |
|     6 | tungsten1 | 000002:0000000000000939;43 |
+-------+-----------+----------------------------+
The channel used by mydb2 had previously applied the sequence number 5. The latest sequence number was previously 6, used in another channel. After two more events in this database, the sequence number has jumped to 8.
The eventID has also changed. The first part of the eventID is the binary log number (as in mysql-bin.000002), the second is the log position (1124), and the third one is the session ID (45).
Enough of peeking over the replicator's shoulder. There are more tools that let you inspect the status of the operations.
We have seen trepctl services, which keeps some of its usefulness also with parallel replication. In the master, it says:
trepctl -host tungsten1 services
NAME              VALUE
----              -----
appliedLastSeqno: 8
appliedLatency  : 0.834
role            : master
serviceName     : logos
serviceType     : local
started         : true
state           : ONLINE
Which is mostly all we need to know.
Since the slave has more than one channel, though, we need more specialized information on that side of the applier. For this reason, we use a more specialized view. We may start with trepctl status, which has information that is roughly equivalent to "SHOW SLAVE STATUS" in MySQL native replication.
trepctl -host tungsten2 status 
NAME                     VALUE
----                     -----
appliedLastEventId     : 000002:0000000000000426;34
appliedLastSeqno       : 0
appliedLatency         : 0.846
clusterName            : 
currentEventId         : NONE
currentTimeMillis      : 1298626724016
dataServerHost         : tungsten2
extensions             : 
host                   : null
latestEpochNumber      : 0
masterConnectUri       : thl://tungsten1:2112/
masterListenUri        : thl://tungsten2:2112/
maximumStoredSeqNo     : 8
minimumStoredSeqNo     : 0
offlineRequests        : NONE
pendingError           : NONE
pendingErrorCode       : NONE
pendingErrorEventId    : NONE
pendingErrorSeqno      : -1
pendingExceptionMessage: NONE
resourcePrecedence     : 99
rmiPort                : -1
role                   : slave
seqnoType              : java.lang.Long
serviceName            : logos
serviceType            : local
simpleServiceName      : logos
siteName               : default
sourceId               : tungsten2
state                  : ONLINE
timeInStateSeconds     : 3483.836
uptimeSeconds          : 3489.47
Also this command, which is perfectly useful in single channel replication, lacks the kind of detail that we are after. Tungsten 2.0 introduces two variations of this command, with more detailed metadata.
trepctl -host tungsten2 status -name tasks
Processing status command (tasks)...
NAME                VALUE
----                -----
appliedLastEventId: 000002:0000000000001305;46
appliedLastSeqno  : 8
appliedLatency    : 0.84
cancelled         : false
eventCount        : 9
stage             : remote-to-thl
taskId            : 0
NAME                VALUE
----                -----
appliedLastEventId: 000002:0000000000001305;46
appliedLastSeqno  : 8
appliedLatency    : 0.841
cancelled         : false
eventCount        : 9
stage             : thl-to-q
taskId            : 0
NAME                VALUE
----                -----
appliedLastEventId: 000002:0000000000000426;34
appliedLastSeqno  : 0
appliedLatency    : 8.422
cancelled         : false
eventCount        : 2
stage             : q-to-dbms
taskId            : 0
NAME                VALUE
----                -----
appliedLastEventId: 000002:0000000000000426;34
appliedLastSeqno  : 0
appliedLatency    : 8.424
cancelled         : false
eventCount        : 1
stage             : q-to-dbms
taskId            : 1
NAME                VALUE
----                -----
appliedLastEventId: 000002:0000000000000763;41
appliedLastSeqno  : 4
appliedLatency    : 0.242
cancelled         : false
eventCount        : 3
stage             : q-to-dbms
taskId            : 2
NAME                VALUE
----                -----
appliedLastEventId: 000002:0000000000001305;46
appliedLastSeqno  : 8
appliedLatency    : 0.846
cancelled         : false
eventCount        : 5
stage             : q-to-dbms
taskId            : 3
NAME                VALUE
----                -----
appliedLastEventId: 000002:0000000000000939;43
appliedLastSeqno  : 6
appliedLatency    : 0.296
cancelled         : false
eventCount        : 3
stage             : q-to-dbms
taskId            : 4
The -name tasks command gives you a list of the latest tasks that were happening.
This is probably more information that you want to know about, but in case of troubleshooting it may become a blessing. Let's follow for a moment what's going on to appliedLastSeqno 8. You will find three tasks with this sequance number. The first one has stage "remote-to-thl", which is the stage where the transaction is transported from the master to the Transaction History List (THL, which is Tungsten lingo to what you may also call a relay log.). The second task that mentions appliedLastSeqno 8 is in stage "thl-to-q", which is the phase where a transaction is assigned to a given shard. The third occurrence happens in stage "q-to-dbms", which is where the transaction is executed in the slave.
For a different view of what is going on, you may use trepctl status -name shards. A Shard, in this context, is the criteria used to split the transactions across channels. By default, it happens by database. We will inspect its mechanics more closely in another post. For now, let's have a look at what shards we have in our slave:
trepctl -host tungsten2 status -name shards
NAME                VALUE
----                -----
appliedLastEventId: 000002:0000000000000763;41
appliedLastSeqno  : 4
appliedLatency    : 0.0
eventCount        : 2
shardId           : mydb1
stage             : q-to-dbms
NAME                VALUE
----                -----
appliedLastEventId: 000002:0000000000001305;46
appliedLastSeqno  : 8
appliedLatency    : 0.0
eventCount        : 4
shardId           : mydb2
stage             : q-to-dbms
NAME                VALUE
----                -----
appliedLastEventId: 000002:0000000000000939;43
appliedLastSeqno  : 6
appliedLatency    : 0.0
eventCount        : 2
shardId           : mydb3
stage             : q-to-dbms
NAME                VALUE
----                -----
appliedLastEventId: 000002:0000000000000426;34
appliedLastSeqno  : 0
appliedLatency    : 0.0
eventCount        : 6
shardId           : tungsten_logos
stage             : q-to-dbms
You may read the information quite easily. Each shard tells you by which key it was identified (shardID), and this is the same as the database name. The appliedLastSeqno and stage we have met already. The appliedLatency is roughly equivalent to MySQL's seconds behind master, but more granular than that. And eventCount tells you how many transactions went through this shard.
If you are the adventurous type, you may have a look at the THL itself, and get a glimpse of how the replication and the parallelism works.
In the slave, type the following
# slave
thl -service logos list |less
Then look for "SEQ#" and you will find the global transaction IDs, or look for "shard=", and you will see the split by database.

More goodies will come next week. Until then, happy hacking!

Tuesday, February 22, 2011

Advanced replication for the masses - Part I - Getting started with Tungsten Replicator

Tungsten Replicator MySQL DBAs and developers: oil your fingers and get ready to experience a new dimension of data replication. I am pleased to announce that Continuent has just released Tungsten Replicator 2.0, an open source data replication engine that can replace MySQL native replication with a set of advanced features.
A note about the source code. The current version of Tungsten Replicator available in the web site is free to use, but it is not yet the open source version. We need a few weeks more to extract the code from the enterprise tree and make a new build. But we did not want to delay the user experience. So everything that is in this build will come with the source code in a short while. In the meantime, enjoy what is available there and have as much fun as we are having.

Why you will want to install Tungsten Replicator 2.0

Tungsten Replicator has a real cool list of features. I am sure that most MySQL DBAs would find something in that list that makes their mouth water in expectation.
Among my favorite features, there is one that looks so innocently non-important that you may be tempted to dismiss it. I am talking about global transaction ID, which is paramount in helping the DBA in switching from master to slave in case of failure or maintenance. I will show an example of a seamless failover in this article.
More things to get excited about: Tungsten allows multiple master replication, i.e. one slave receiving data from several sources, and parallel replication, meaning that a slave can apply changes from the master using many parallel threads. I will talk about all of those features in my blog. But to get to that point, I will need to start by covering the basic installation first. Since Tungsten is much more powerful than MySQL native replication, it also comes with greater complexity. We are working at reducing such complexity. In the meantime, you can start with the instructions that come in this post.

Getting ready

You will need at least two servers, with Java 1.6, Ruby 1.8, and MySQL 5.1 installed.
You may use your own virtual machines, or spare servers, or you can use a pre-defined VMWare image that you can use with VMware player (or VMware Fusion on Mac).
The following instructions refer to the pre-configured VM. You may skip the initial steps if you are using your own servers.

  1. download a pre-configured image
    https://files.continuent.com.s3.amazonaws.com/Tungsten_MySQL_CentOS_5_5_VMWare_Image.7z
    Warning: it's 1.5 GB, and it expands to 5.5 GB
  2. Expand the VM
  3. Make a copy of the VM. Change the directory names so that you will refer to them as tungsten_vm1 and tungsten_vm2
  4. launch both VMs
  5. Connect to each VM. User names and password for root are in a .doc file within the VM directory.
  6. Change the hostname of the VMs to tungsten1 and tungsten2 (don't forget to modify /etc/sysconfig/network to make the name sticky)
  7. Update /etc/hosts/ with the IP address and hostname of both servers
  8. Switch to the tungsten user
    su - tungsten
  9. Create a directory $HOME/replicator
  10. Get the Tungsten package into that directory
    cd replicator
    wget https://s3.amazonaws.com/releases.continuent.com/tungsten-replicator-2.0.0.tar.gz
  11. Get the setup scripts from Tungsten Replicator home .
    wget http://tungsten-replicator.googlecode.com/files/simple_install_master_slave.tar.gz
  12. unpack the scripts in $HOME/replicator

I know this was a long list, but it is not terribly difficult. More difficult would be setting all the above manually. As it is today, all you need to do is running the "set_replication.sh" script and Tungsten will come alive to your server in less than one minute.
To do things properly, you will need to do the same operations on both servers. So, assuming that you have done everything in tungsten1, you can easily mirror the operations to tungsten2. The virtual machines come with an already installed public SSH key that makes your installation life easier.
# in tungsten1
cd $HOME/replicator
ssh tungsten2 mkdir replicator
scp simple_install_master_slave.tar.gz tungsten2:$PWD
scp tungsten-replicator-2.0.0.tar.gz tungsten2:$PWD
ssh tungsten2 'cd replicator; tar -xzf simple_install_master_slave.tar.gz '
Now that you have the same set of files in both machines, you can trust the wisdom of the installation files and run:
# tungsten1
./set_replication.sh
ssh tungsten2 $PWD/set_replication.sh
This will start the Tungsten replicator in both servers.

Cleaning up

The sample scripts come with one that is dedicated to cleaning up. There is a "clear_cluster.sh" script that will remove all test data from the database, sweep the tungsten directory away, leaving your system ready to start afresh. As this is a testing environment, this strategy is not so bad. But be aware of the potentially destructive nature of this script, and don't use it in a production environment.

Under the hood

Tungsten replicator is a complex piece of software, and it's easy to get lost. So here are a few tips on how to get your bearings.
You will find a log file under $HOME/replicator/tungsten/tungsten-replicator/logs/.
This is quite a noisy log, which is supposed to give the developers all information about what's going on in case of a failure. For newcomers, it is quite intimidating, but we are working at making it easier to read. (Be aware that you may find some references to "tungsten-enterprise" in the logs. Don't let this fact deter you. We are working at splitting the former name associations from the packages, and eventually you will only find references to modules named "tungsten-replicator-something" in the logs.)
At the end of the installation, you should have seen a line inviting you to modify your path to get the replication tools available at your fingertips. Most notable is trepctl, the Tungsten Replicator ConTroL.
Using this tool, you can get some information about the replicator status, and perform administrative tasks. A glimpse at the Tungsten Replicator Guide 2.0 will give you an idea of what you can do.
For now, suffices to say that you can use trepctl to get the state of the replicator.
Try, for example, the following:

$ trepctl -host tungsten1 services
NAME              VALUE
----              -----
appliedLastSeqno: 0
appliedLatency  : 0.933
role            : master
serviceName     : logos
serviceType     : local
started         : true
state           : ONLINE

$ trepctl -host tungsten2 services
NAME              VALUE
----              -----
appliedLastSeqno: 0
appliedLatency  : 0.966
role            : slave
serviceName     : logos
serviceType     : local
started         : true
state           : ONLINE
The most important things here are the "state" field, and the "appliedLastSeqno", which is the global transaction ID that we have mentioned before.
If you create or modify something in the master and issue this command again, you will see that the appliedLastSeqno will increment.
You can get some of this information from the MySQL database, where Tungsten keeps a table with the latest status. You may say that this table is roughly equivalent, at least in principle, to the information in SHOW SLAVE STATUS available with native replication.

$ mysql -h tungsten1 -u tungsten -psecret \
    -e 'select * from tungsten_logos.trep_commit_seqno\G'
*************************** 1. row ***************************
        task_id: 0
          seqno: 0
         fragno: 0
      last_frag: 1
      source_id: tungsten1
   epoch_number: 0
        eventid: 000002:0000000000000416;102
applied_latency: 0
What is this "tungsten_logos' database? It is the database that Tungsten creates for each service that was installed. In this case, 'logos' is the service name contained in this sample installation. If you modify the scripts in both servers, and replace 'logos' with 'ripe_mango', you will see that Tungsten creates a 'tungsten_ripe_mango' database, with the same kind of information.

The basic principle to acquire before moving to more complex topics is that replication in Tungsten is a collection of services. While the native MySQL replication is a simple pipeline from master to slave, without deviations, Tungsten implements several pipelines, which you can use one by one or in combination. It looks more complex than necessary, but in reality it makes your planning of complex topologies much easier. Instead of making basic replication more complex, Tungsten adopt the principle of deploying the appropriate pipeline or pipelines for the task.
I leave to Robert Hodges, CEO and main architect of Tungsten, the task of explaining the nuts and bolts.

A sample of Tungsten power: switching from master to slave

It is probably too much information already for a blog post, but I would like to leave you with the feeling that you are dealing with an extremely powerful tool.
The instructions below will perform a seamless switch between the master and the slave.
Please follow these steps, but make sure there is no traffic hitting the old master during this time, or you may experience consistency issues:

#first, we tell both servers to stop replicating
$ trepctl -service logos -host tungsten2 offline
$ trepctl -service logos -host tungsten1 offline

# Now that they are offline, we tell each server its new role
# tungsten2 becomes the new master
$ trepctl -service logos -host tungsten2 setrole -role master 

# and then we tell tungsten1 that it's going to be a slave,
# listening to tungsten2 for data
$ trepctl -service logos -host tungsten1 setrole -role slave -uri thl://tungsten2

# now we put both servers online with the new instructions
$ trepctl -service logos -host tungsten2 online
$ trepctl -service logos -host tungsten1 online

# and we check that indeed they are both online with the new roles.
$ trepctl -host tungsten1 services
$ trepctl -host tungsten2 services
After this set of instructions, tungsten2 is the master, and if we write to it, we will see the changes replicating to tungsten1.

That's it for today. In the next articles, we will take a look at parallel replication.

We want to hear from you

We have released Tungsten Replicator as open source because we believe this will improve the quality of our product. We are looking for bug reports, cooperation, suggestions, patches, and anything that can make the product better. You can report bugs at the project home.
We are particularly eager to hear about user experience. We are aware that the user interface can be better, and we need some input on this matter from interested users.

A note about security

What is described in this article is for testing purposes only. Please use the virtual machines that were mentioned in this article behind a firewall. The VM was designed with friendliness in mind, but as it is, it's far from secure.

Monday, February 14, 2011

How to detect if a MySQL server is an active replication slave

Sometimes you know for sure. And sometimes you wonder: Is this server part of a replication system? And, most specifically, is it an active slave?
The completeness of the answer depends on how much visibility you have on the server.
If you can ask the DBA, and possibly have access to the server data directory and configuration file, you can get a satisfactory answer. But if your access is limited to SQL access, things get a bit more complicated.
If you have the SUPER or REPLICATION_CLIENT privilege, then it's easy, at least in the surface.
SHOW SLAVE STATUS will tell you if the slave is running. An empty set means that the server was not configured as a slave.
The answer is not absolute, though. You need to read the output of SHOW SLAVE STATUS to understand if replication is under way.
For example, what is the difference between these two listings?

## listing 1
*************************** 1. row ***************************
               Slave_IO_State: 
                  Master_Host: QA1
                  Master_User: tungsten_slave
                  Master_Port: 3306
                Connect_Retry: 60
              Master_Log_File: 
          Read_Master_Log_Pos: 4
               Relay_Log_File: QA2-relay-bin.000001
                Relay_Log_Pos: 4
        Relay_Master_Log_File: 
             Slave_IO_Running: No
            Slave_SQL_Running: No
              Replicate_Do_DB: 
          Replicate_Ignore_DB: 
           Replicate_Do_Table: 
       Replicate_Ignore_Table: 
      Replicate_Wild_Do_Table: 
  Replicate_Wild_Ignore_Table: 
                   Last_Errno: 0
                   Last_Error: 
                 Skip_Counter: 0
          Exec_Master_Log_Pos: 0
              Relay_Log_Space: 106
              Until_Condition: None
               Until_Log_File: 
                Until_Log_Pos: 0
           Master_SSL_Allowed: No
           Master_SSL_CA_File: 
           Master_SSL_CA_Path: 
              Master_SSL_Cert: 
            Master_SSL_Cipher: 
               Master_SSL_Key: 
        Seconds_Behind_Master: NULL
Master_SSL_Verify_Server_Cert: No
                Last_IO_Errno: 0
                Last_IO_Error: 
               Last_SQL_Errno: 0
               Last_SQL_Error: 
## Listing 2
*************************** 1. row ***************************
               Slave_IO_State: 
                  Master_Host: QA1
                  Master_User: test
                  Master_Port: 3306
                Connect_Retry: 60
              Master_Log_File: 
          Read_Master_Log_Pos: 4
               Relay_Log_File: QA2-relay-bin.000001
                Relay_Log_Pos: 4
        Relay_Master_Log_File: 
             Slave_IO_Running: No
            Slave_SQL_Running: No
              Replicate_Do_DB: 
          Replicate_Ignore_DB: 
           Replicate_Do_Table: 
       Replicate_Ignore_Table: 
      Replicate_Wild_Do_Table: 
  Replicate_Wild_Ignore_Table: 
                   Last_Errno: 0
                   Last_Error: 
                 Skip_Counter: 0
          Exec_Master_Log_Pos: 0
              Relay_Log_Space: 125
              Until_Condition: None
               Until_Log_File: 
                Until_Log_Pos: 0
           Master_SSL_Allowed: No
           Master_SSL_CA_File: 
           Master_SSL_CA_Path: 
              Master_SSL_Cert: 
            Master_SSL_Cipher: 
               Master_SSL_Key: 
        Seconds_Behind_Master: NULL
Master_SSL_Verify_Server_Cert: No
                Last_IO_Errno: 0
                Last_IO_Error: 
               Last_SQL_Errno: 0
               Last_SQL_Error: 
They look almost the same, and yet the similarity is deceiving. The first listing is what you get immediately after a call to CHANGE MASTER TO. If you run START SLAVE at this point, replication will start flowing.
The second listing is what you get immediately after a call to RESET SLAVE. The crucial difference is that RESET SLAVE removes the two .info files containing replication credentials and positions. A call to START SLAVE in this scenario will only get you an error, as the slave does not know where and how to connect.
So, in this case, SQL visibility does only tell you that the server is not receiving replication date, and that it was at least once configured as a slave. The telltale detail is the user name ("test") that should give you a hint of something fishy going on. Unless you have called your user "test", in which case you were asking for trouble. I would say that this situation is a bug. RESET SLAVE should remove every memory of the slave configuration, and instead it keeps only the host name. Although it is not clear in this particular example, it also forgets the master connection port.

Now, if your purpose was to set replication with different coordinates, the good news is that in both cases a well formed call (*) to CHANGE MASTER TO will do what you expect, i.e. it will establish the credentials to the master, so that a further invocation of START SLAVE will let replication data flow.

(*) By "well formed" I mean a call that includes host, port, username, password, binary log file and position, and eventually all the information that you need to get the slave at work.

Tuesday, February 08, 2011

Webinar: Percona and Continuent on backup and replication with huge data

On Thursday, February 10, at 10am PST, there is a free webinar about Managing Big Data with Percona Server, XtraBackup and Tungsten. Quoting from the announcement:

Big data is a big problem for growing SaaS businesses and large web applications. In this webinar, we'll teach you how to set up Percona Server, XtraBackup, and Tungsten to manage Terabyte+ databases and scale to millions of transactions a day. We'll discuss the latest features for high transaction performance like InnoDB buffer pool dump/restore and HandlerSocket, our favorite tricks for backup, restore, and provisioning of large data sets, and how to replicate scalably and safely using Tungsten Replicator with parallel apply.

The presenters are representatives of both Percona and Continuent,
Vadim Tkachenko, Percona Co-Founder & CTO,
Robert Hodges, Continuent CEO
Edward Archibald, Continuent CTO

The event will showcase Xtrabackup and Tungsten features in an interesting combined view.
The event is free, but registration is required.

Monday, February 07, 2011

Evolution of MySQL metadata

I was looking at the latest MySQL versions, and I happened to notice that there has been a great increment in the number of metadata tables, both in the information_schema and performance_schema databases. So I made a simple count of both schemas in the various versions, and draw a graph. The advance looks straightforward.

versionInformation_schemaperformance_schema
5.0.92170
5.1.54280
5.1.54 with innodb plugin350
5.5.83717
5.6.24823


The difference between 5.0 and 5.6 is staggering. We came from 17 to 71 metadata total tables. A stacked bar chart helps visualize the changes.


I noticed, BTW, that MySQL 5.0.92, which is not in active support, was released without the binaries for Mac OSX. If this kind of edition is limited to the versions in extended support, that's fine with me. I hope the habit does not contaminate the regular builds.

Thursday, February 03, 2011

Open Database Camp - Accommodation and Sponsoring

Sponsoring Open Database Camp
The Open Database Camp 2011 is shaping up nicely.
The logistics is being defined and local and international volunteers are showing up for help. (Thanks, folks!)
If you want to start booking, there is a list of hotels in the Accommodation page.
And don't forget to sign up in the Attendees list.
Local travel information will be released as soon as we finish cranking up the plan.
Open Database camp is free, but we still have expenses to get the job done.
We need both official sponsors and personal donations. No minimum amount required. You can donate painlessly online through the nonprofit organization Technocation. (Thanks!)
Please see the Sponsors page for more info.

Sunday, January 30, 2011

A first look at delayed replication in MySQL 5.6

Delayed replication If you like fresh features, you should not miss this one. MySQL 5.6.2 includes, among other improvements, the implementation of Time delayed replication, a feature that lets you tell the slave not to apply changes from the master immediately, but to wait N seconds.
The feature is documented in WL#344. (There was a manual online as well together with the binaries for MySQL 5.6.0, but they were removed after a few days for a good reason. I am confident that both the manual and some binaries will eventually show up soon).
Since as of today there are no binaries for MySQL 5.6.x, you need to get the code and compile it yourself. Just get the code from https://code.launchpad.net/mysql-server and compile it using the instructions in building MySQL 5.5 with cmake.
To get a taste of this new feature, the quickest way is to set up replication using the binaries that you have built and MySQL Sandbox.
make_replication_sandbox  mysql-5.6.2-m5-osx10.6-.tar.gz 
# the file name may change, depending on the operating system you are using
Soon you will have one master and two slaves in $HOME/sandboxes/rsandbox_5_6_2.
What you have to do is connect to one of the slaves and enter these commands:

STOP SLAVE;
change master to master_delay=60;
START SLAVE;
Let's say that you did this to slave #2.
Now whatever you do in the master will be replicated immediately in slave #1, but it will executed with 60 seconds delay in slave #2.
To be clear, the IO_THREADs of both slaves keep getting data from the master as fast as they can, same as they did until version 5.5, but slave #2 will hold the SQL_THREAD for the defined amount of seconds.
This new state is visible in the output of the SHOW SLAVE STATUS command, which lists this information after you do something in the master like creating a table or inserting data:

               SQL_Delay: 60
     SQL_Remaining_Delay: 43
 Slave_SQL_Running_State: Waiting until MASTER_DELAY seconds after master executed event
The main purpose of delayed replication is to protect the server against human mistakes. If I accidentally drop a table, the statement is instantly replicated to all the slaves, but it is not executed to the delayed slaves.

$ ./m -e 'drop table test.t1 '
$ ./use_all 'show tables from test'
# master  
# server: 1: 
# server: 2: 
Tables_in_test
t1
The table is gone in the master, and it is gone in the regular slave, but it is still there in the delayed slave. And if I detect the problem before the delayed statement gets executed (a delay time longer than 60 seconds would be advisable in this case, 3600=1 hour, seems healthier), then I may be able to recover the data.

I notice en passant that there is much more than delayed replication going on in MySQL 5.6. For example, the information_schema tables related to InnoDB have increased from 7 to 18:

 show tables from information_schema like 'innodb%';
+----------------------------------------+
| Tables_in_information_schema (innodb%) |
+----------------------------------------+
| INNODB_CMPMEM                          |
| INNODB_TRX                             |
| INNODB_BUFFER_PAGE                     | *
| INNODB_LOCK_WAITS                      |
| INNODB_SYS_TABLESTATS                  | *
| INNODB_CMP                             |
| INNODB_SYS_COLUMNS                     | *
| INNODB_CMPMEM_RESET                    |
| INNODB_SYS_FOREIGN_COLS                | *
| INNODB_BUFFER_PAGE_LRU                 | * 
| INNODB_BUFFER_POOL_STATS               | *
| INNODB_CMP_RESET                       |
| INNODB_SYS_FOREIGN                     | *
| INNODB_METRICS                         | *
| INNODB_SYS_INDEXES                     | *
| INNODB_LOCKS                           |
| INNODB_SYS_FIELDS                      | *
| INNODB_SYS_TABLES                      | *
+----------------------------------------+
18 rows in set (0.00 sec)
# (*) new tables marked with a star
What they do and how to play with them will be matter for some more investigation.

Friday, January 28, 2011

The MySQL Council is up and running. We want to hear from you!

The Independent Oracle User Group (IOUG) has formed the MySQL Council, with the purpose of addressing the interests and needs of MySQL users.

The current Council members are:
  • Sarah Novotny, Blue Gecko, Council Chair
  • Sheeri Cabral, PalominoDB
  • Bradley Kuszmaul, Tokutek
  • Giuseppe Maxia, Continuent
  • Rob Wultsch, GoDaddy.com
  • Matt Yonkovit, Percona
The IOUG is a well established and respected institution, with more than 20,000 database professionals registered as its members. In the long history of Oracle, the IOUG has always played a role in the aftermath of many acquisitions, extending a friendly hand to the newcomers in the family. I have spent much time with IOUG people, and I was impressed by their enthusiasm and professionalism. My impression of the IOUG is that it is a friendly group of people with the common goal of improving the experience of being an Oracle user.
The IOUG is not looking for assimilation. While Oracle business strategy calls for full integration, the IOUG recognizes that users come in different sizes and shapes, and they cannot be forced into the institution. Instead, the IOUG want to understand the newcomers and offer their services to help out towards the common goals. The IOUG people also know that many old Oracle users are also MySQL users. By facilitating the integration of the MySQL community they are serving the needs of a wider population than the traditional set of MySQL users.

The MySQL community has never been organized as a whole. There id nothing comparable to the massive presence of the Oracle user group. MySQL users are mostly isolated. When they convene into social entities, they identify themselves either by town boundaries or by being member of some group that has some interest in MySQL (Linux distributions, PHP developers, CMS framework users). There is no unified view of what users represent or want, and a difficult dialog between the user base and the company that produces the software.
With Oracle, this lack of unity is yet another obstacle in the path to a good understanding. Oracle is used to talk to a large entity representing its users, and it has not the patience or the skills to deal with such a distributed presence as the MySQL community. For this reason I believe that the MySQL Council is a good idea. It provides a tool for the will of the MySQL community to be conveyed to the company, using the IOUG, one of the channels that are familiar to Oracle, and that are more likely to reach the decision makers.

The main goal of the council should be to mend fences. There is much to be done. The culture of traditional Oracle users and that of MySQL users are different and sometimes hard to reconcile. Oracle strategies that were tuned towards pleasing their traditional customers may not suit the needs of the newcomers. All this needs to be addressed, and the MySQL Council could be the first step to the solution.

For this reason, the council members want to hear from the community. What are the main pain points and issues that you want addressed? What is Oracle doing right with MySQL? Where could it improve?

If you know one or more of us, please contact us by email. Or write a blog post about the issues to address. Or comment in our blogs. We want to hear from you. We feel that we must represent the larger MySQL community and bridge the gaps between the company and the user base.

The roles of the MySQL Council is not only to be a diplomatic channel of communication between users and company. It will also help with the diffusion of MySQL culture among Oracle users, with articles, conferences, meetings, and whatever the imagination provides to achieve the goal of spreading the word.

Also for this goal we welcome your input. Make your voice heard. It's time to boost the technical writing in Planet MySQL and in the rest of the net. Let MySQL be known!

Tuesday, January 25, 2011

Joining the Oracle ACE program

Ace charmer A few days ago I received an invitation to join the Oracle ACE program, which is a group of strong community enthusiasts and advocate of Oracle products.
Since I have been a vocal member of the MySQL community for years, I welcome this acknowledgment as well as I appreciated being nominated MySQL Community Contributor of the Year in 2006. Unlike that award, which came from inside the MySQL company, the Oracle ACE nomination came from my peers in the community, to whom I address my thanks and appreciation.
The nomination comes from the community, but the title is granted by the company, as recognition for good work. Therefore, thanks also to my former colleagues at Oracle who have approved my current status.
For the ones who are curious, being an Oracle ACE does not mean becoming an employee, or having obligations towards Oracle. There is not even an obligation to be kind towards the company, meaning that Oracle ACEs can be as outspoken as they feel they should. So, there is no restraint on what I can tell in public, and no expectations of unconditional support for Oracle policies.
What you can expect is for me to be my usual self, the guy who is enthusiast about cool technology, no matter where it comes from, and critical or appreciative depending on merit.
Now, back to hacking!

Saturday, January 22, 2011

Pitfalls of monitoring MySQL table activity with stored routines

monitoring tables A friend of mine needed a quick method to monitor a table that was frequently updated. There were several procedures writing to the table several times per second. He needed a quick way of determining how many updates per second the table was getting.
The table has only one row, which includes a counter that is increased at each operation. Therefore, the simple plan was:
  1. Let's get the counter from the table;
  2. Allow N seconds to pass;
  3. Get the counter again;
  4. The difference between the second counter and the first counter, divided by the number of seconds gives the updates per second.
The plan makes sense, and if you run the above commands manually, you get what you want.
However, my friend wanted the update ratio to be a single operation, say like:

SELECT update_ratio();
He went to make a simple function, following the four steps described above.


delimiter //
drop function if exists update_ratio //
create function update_ratio()
RETURNS INT 
begin
     declare sleep_wait int default 5;
     declare start int default 1;
     declare finish int default 1;

     set start = (select counter from mytable);
     do sleep(sleep_wait);
     set finish = (select counter from mytable);
     return (finish-start)/sleep_wait;
end $$
delimiter ;
It seems OK. The function runs without errors, but it always returns zero.
Mystery! Running the statements manually gives always a sensible result. Using triggers to monitor the table shows that indeed it is updated many times per second, but the function returns always zero.
More puzzling is the fact that if we convert the function to a procedure, it gives the wanted result.

The solution to the mystery is found in the MySQL online manual

A stored function acquires table locks before executing, to avoid inconsistency in the binary log due to mismatch of the order in which statements execute and when they appear in the log.

In other words, it means that all tables referenced in a stored functions are locked when the function starts. Therefore the external procedures that were updating the table will have to wait until the function's end before updating. When the function reads from the table, it gets always the same record counter, because no updates were happening in the meantime. That's why the second read is the same as the first one, and the result is zero.

What should you do then?
One option is to convert the function into a procedure:

delimiter //
drop procedure if exists show_update_ratio //
create procedure show_update_ratio()
begin
     declare sleep_wait int default 5;
     declare start int default 1;
     declare finish int default 1;
    
     select counter into start from mytable;
     do sleep(sleep_wait);
     select counter into finish from mytable;
     SET @UPS := (finish-start)/sleep_wait;
end //
That gets the job done. If you want to get the result into a variable, you can do it with two statements.

call show_update_ratio();
select @UPS;
If you don't change the last SET into a SELECT and just display the value.

Another option is using several SQL commands from your application. Also in this case, make sure that you are NOT wrapping this code inside a transaction, or you will get the same result in both queries
# WRONG!
     set autocommit=0;
     BEGIN;
     select counter into @start from mytable;
     set @start = start;
     do sleep(5);
     select counter into @finish from mytable;
     select (@finish - @start) / 5 as UPS;
If you go for this solution (or even the stored procedure), make sure that you are either using autocommit, or commit after each query if you must use a transaction.